
Introduction
Thanks for purchasing the Glade framer website template and for your support!
The following documentation should provide you with all the necessary information for you to customise the template and make it your own.
Haven't bought the template yet? Buy it here.
If you're brand new to Framer, I recommend starting off with the Framer Fundamentals course to get familiar with the way it works.
The basics
Let's start off with the first things I recommend working on to get the template inline with your brand identity with as little effort as possible.
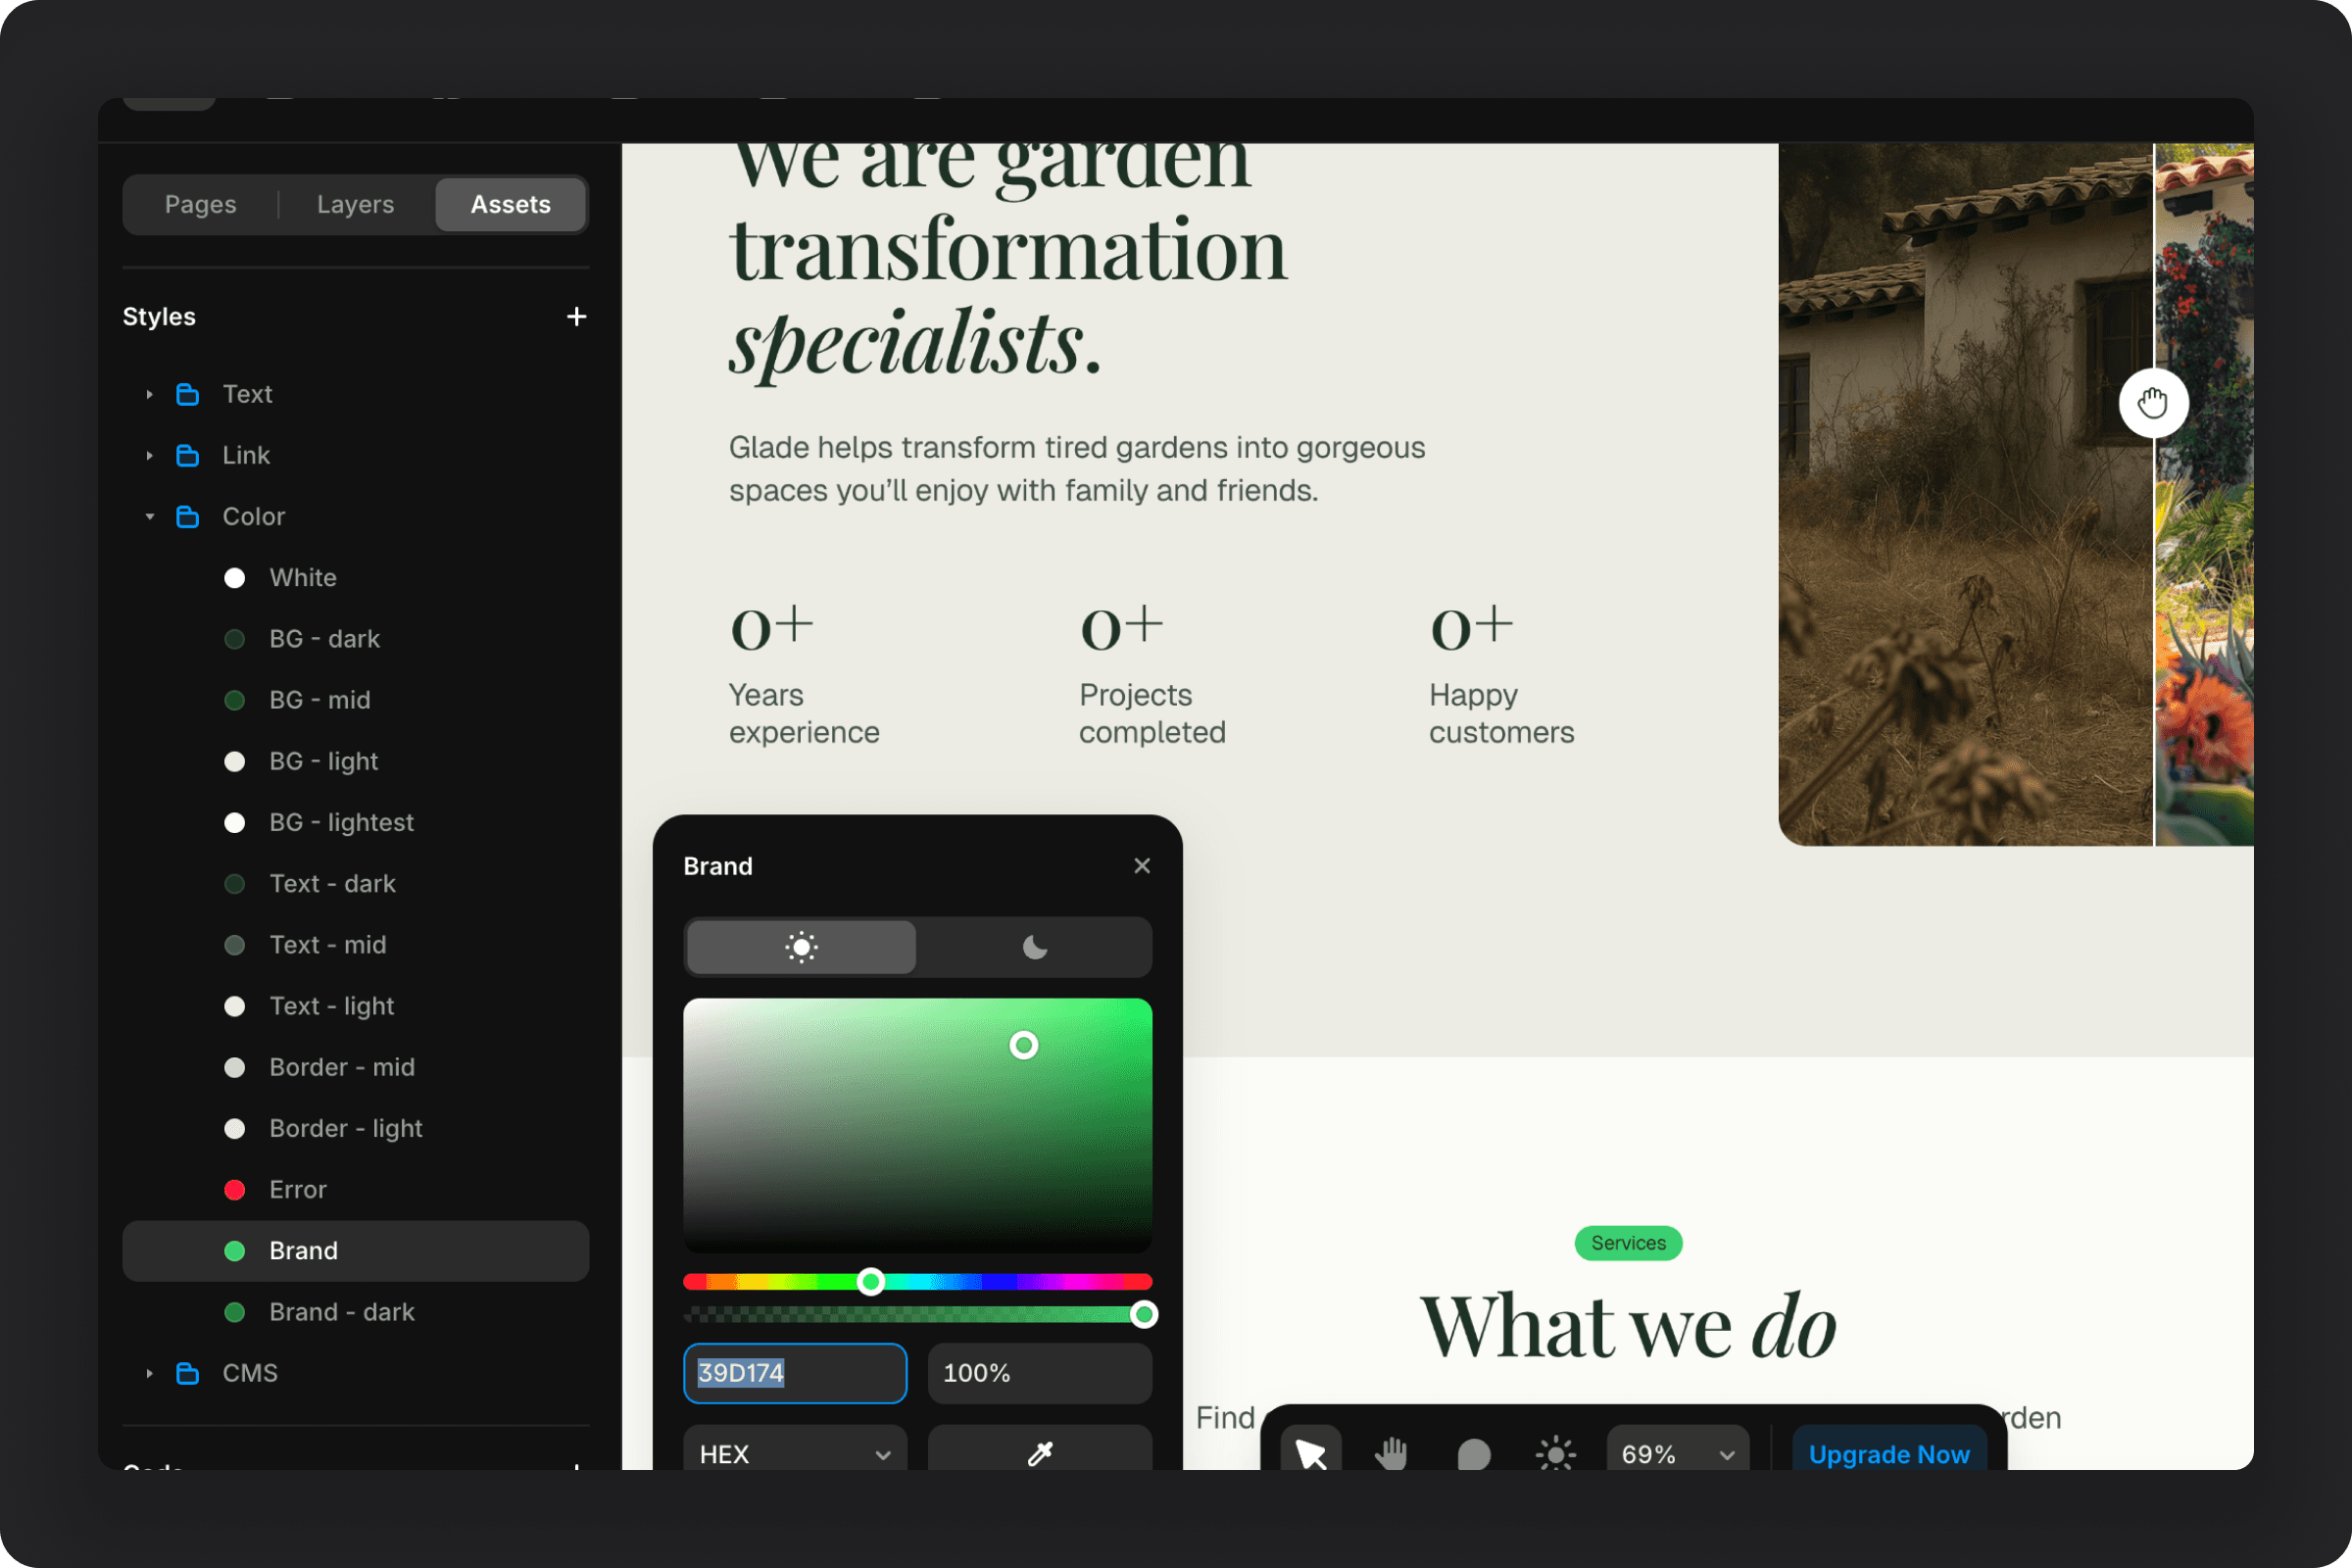
Colors
Colors are named based on where/how they are used. To edit the colors:
Click the "Assets" tab at the top of the left panel.
Scroll down to the "Styles" section.
Click on the folder named "Color".
Click one you want to edit and use the color picker or enter a HEX code.
I recommend editing the brand colors first, and then the "BG - dark" and "Text - dark" colors as they are used the most and will make the biggest difference to the look and feel of your site.
Text & Fonts
I recommend leaving the text styles as they are but if your brand uses a specific font, you can edit them in a similar way to the colors:
Click the "Assets" tab at the top of the left panel.
Scroll down to the "Styles" section.
Click on the folder named "Text".
Find the styles you want to edit. Blog and Legal page styles are in the CMS subfolder.
Click one you want to edit and change things like the font, font weight, and other properties.
Logo
The logo is set up as a component which means you only need to change it in one place and it'll update in the header and footer.
Click the "Assets" tab at the top of the left panel.
Scroll down to the "Components" section.
Open the "Navigation" folder.
Click on the "Logo" component to open the component editor view.
Drag your logo onto the canvas, outside of the component variables (purple boxes). This will maintain it's aspect ratio.
Click the "Layers" tab at the top of the left panel.
Click the corresponding variant based on your logo's file type.
Drag your logo from the canvas into the variant so it becomes a child.
Delete the Glade logo.
The logo component is set to 132px width and because the aspect ratio of your logo is fixed, it'll scale down to that size. If it looks to small or too big, you can adjust the width of the top level layer in the right panel.

Header and Footer
The Header and Footer are set up as components in the same way as the Logo. There are a few bits of text (and links) to edit in them to bring your new site inline with your business:
Location in the Header.
Copyright information in the Footer.
Email & Phone Number in the Footer.
Social media links in the Footer.
Images and content
Lastly and most importantly you need to go through and change all of the content across the site. You can keep any images you want as they are AI generated and copyright free, however I recommend changing them to real images from your business.
You can edit any block of text or image by double clicking it or by clicking it once and scrolling down to the "Content" or "Fill" field in the right panel.
Text and images inside components (they're purple when you click them) will have clearly labeled variables in the right panel to edit them, as shown in the image below for the "Case Study Card" component.


